
Ombre crib quilt tutorial
This quilt in progress has gotten some buzz on Instagram from a few folks who think it looks a whole lot more complicated than it is. So today I’m bringing you a tutorial. Basically if you can make binding, you can make this quilt. It’s that easy.
http://instagram.com/p/jP_js1P4fj/
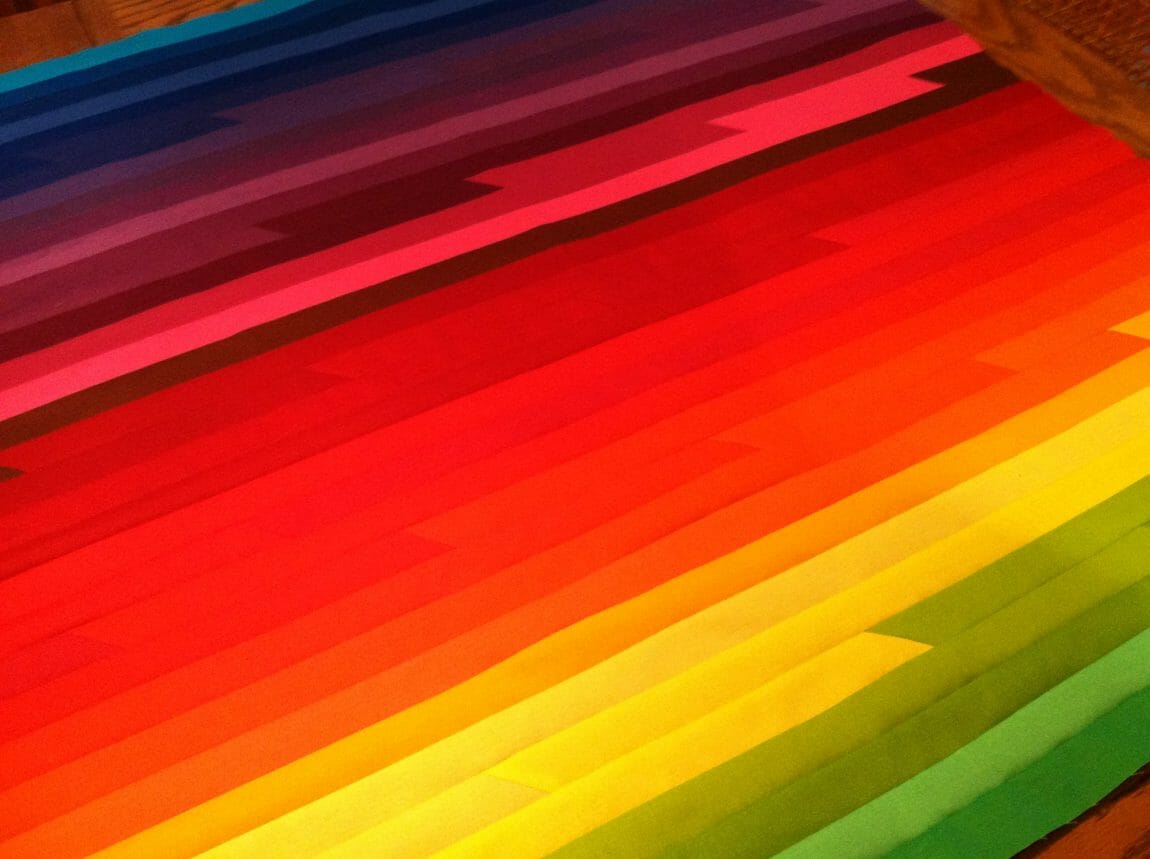
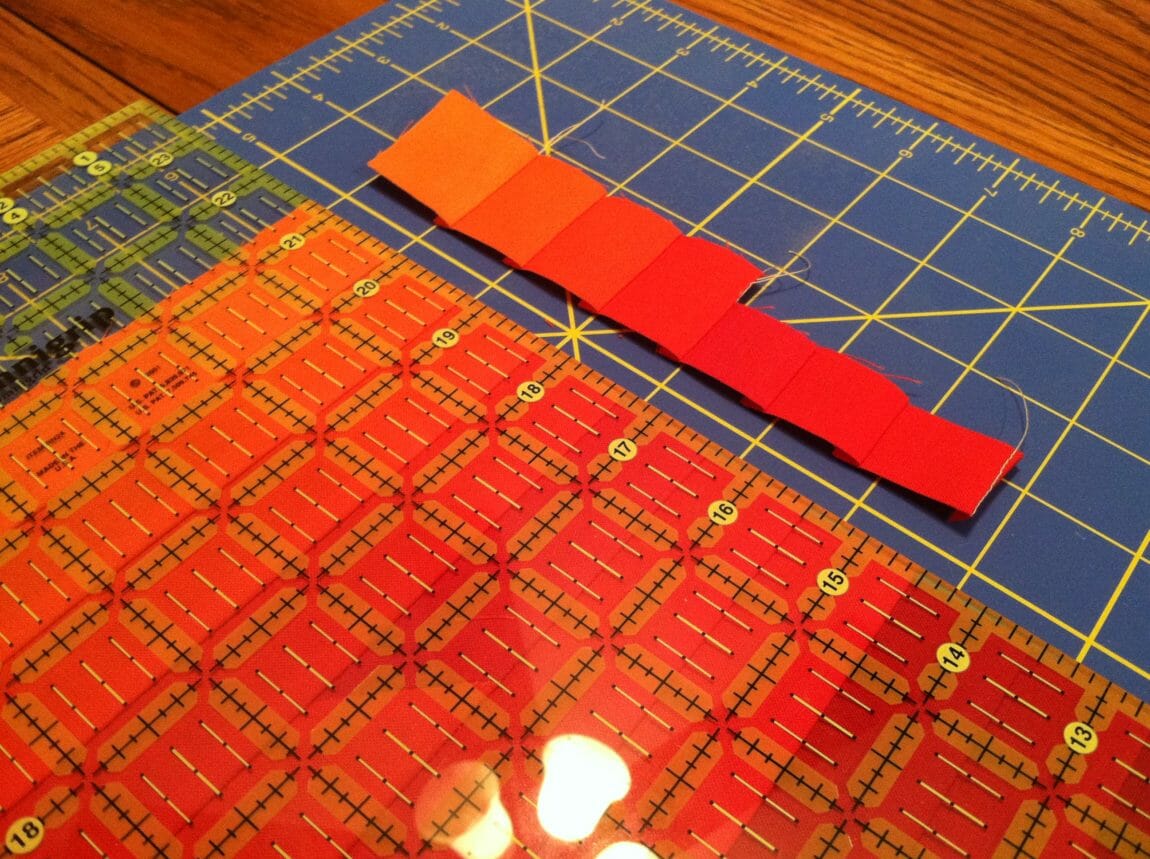
I started with a jelly roll of Classic Kona Cotton Solids Skinny Strips. The Skinny jelly roll is just 1 1/2″ wide, which turns out to be the perfect size for a crib quilt. But you could use a regular jelly roll and get a lap quilt with this when you’re done. The idea was to make the quilt with an ombre or rainbow effect so that one color would blend into the next as you made your way down the quilt. So I took the idea of the 1600 quilt, in which you sew an entire jelly roll together, then cut it in half and sew two long sides together. In the 1600, you keep repeating this process until you have a quilt of acceptable size, but it also results in random placement of the fabric, which wouldn’t give me the ombre effect I was looking for.
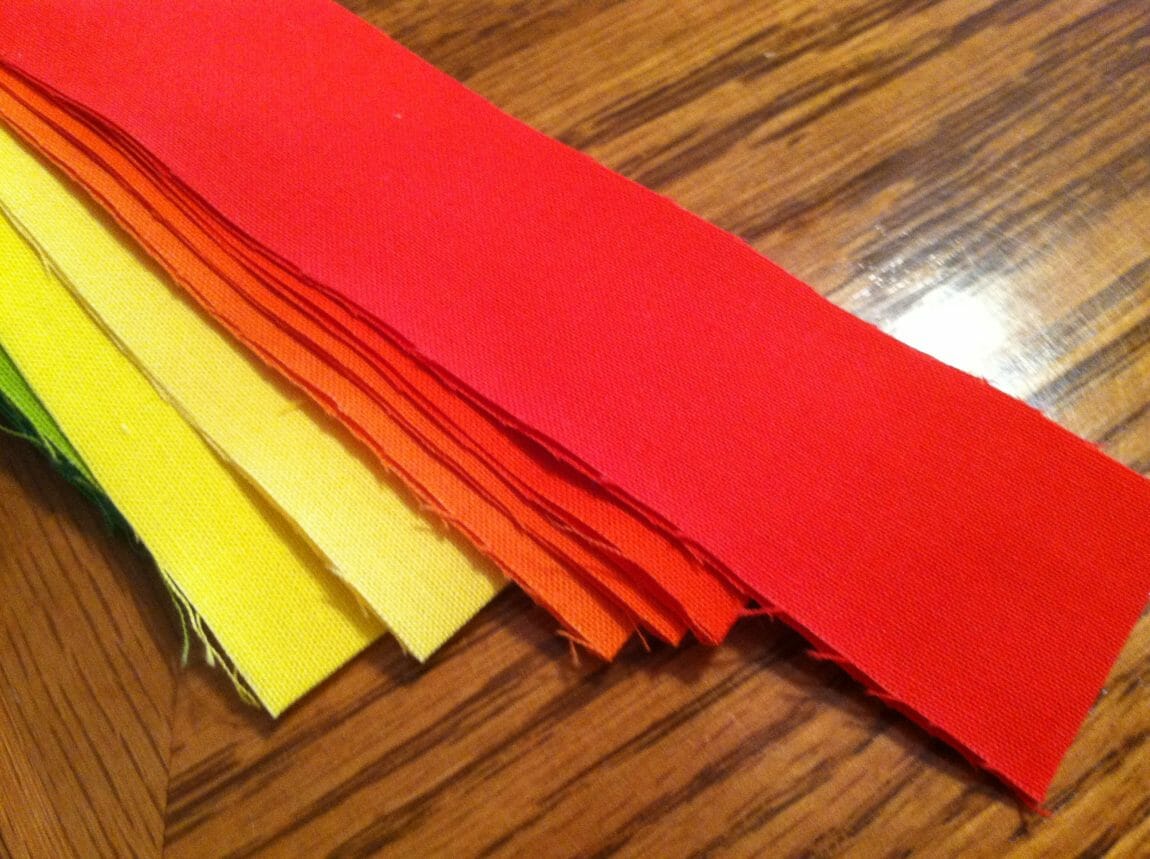
To remedy that problem, I sewed one strip at a time, instead of the whole roll at once. Here’s how it works. Your jellyroll comes in order to produce the ombre effect, all you have to do is unroll it and keep pulling strips from the top of the stack to make the colors blend into one another as you make your way down the quilt.
Step 1 – Start by cutting the first strip in half and discarding one half. This will make your transitions vary in placement as you go down the quilt.
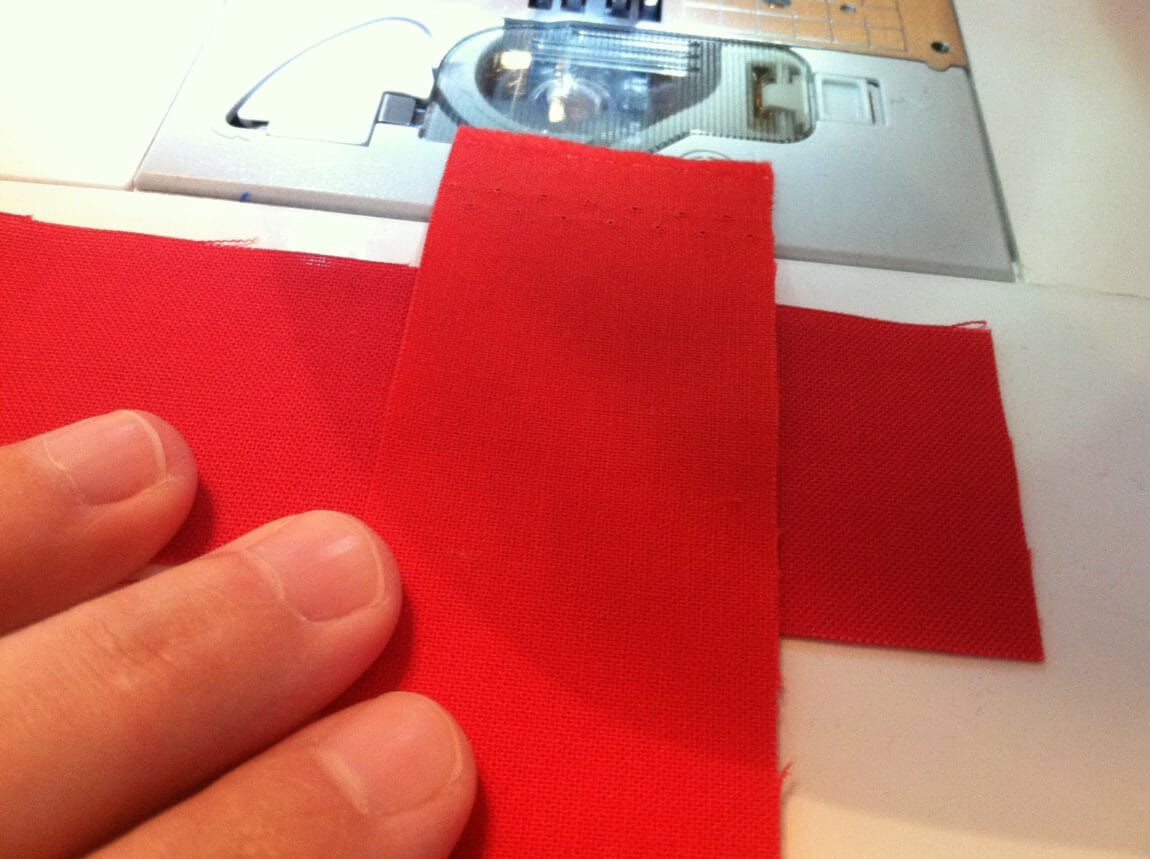
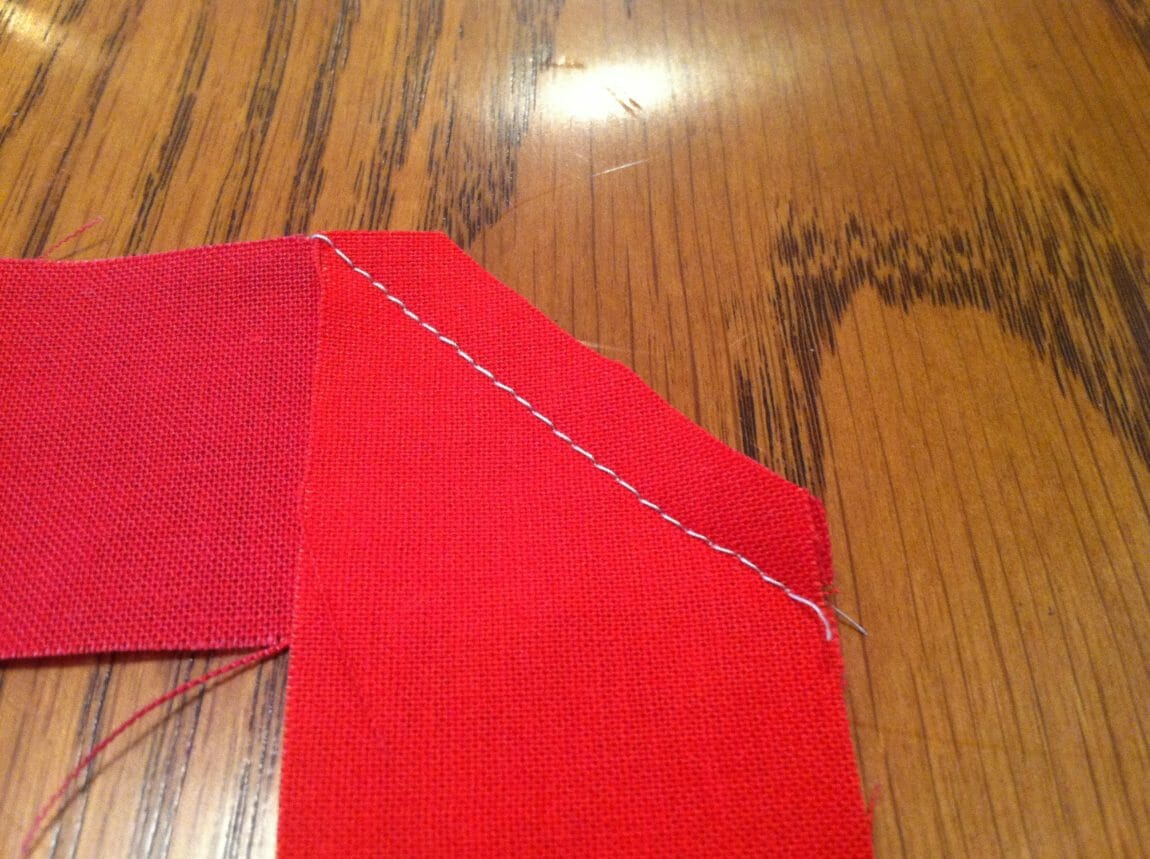
Step 2 – Line the selvage end of the fabric up with the selvage end of the next fabric in the stack at a right angle. The first fabric should be going to to the left and the second fabric should be going toward you. Keep this arrangement for all your strips and all your transitions will turn out the same.
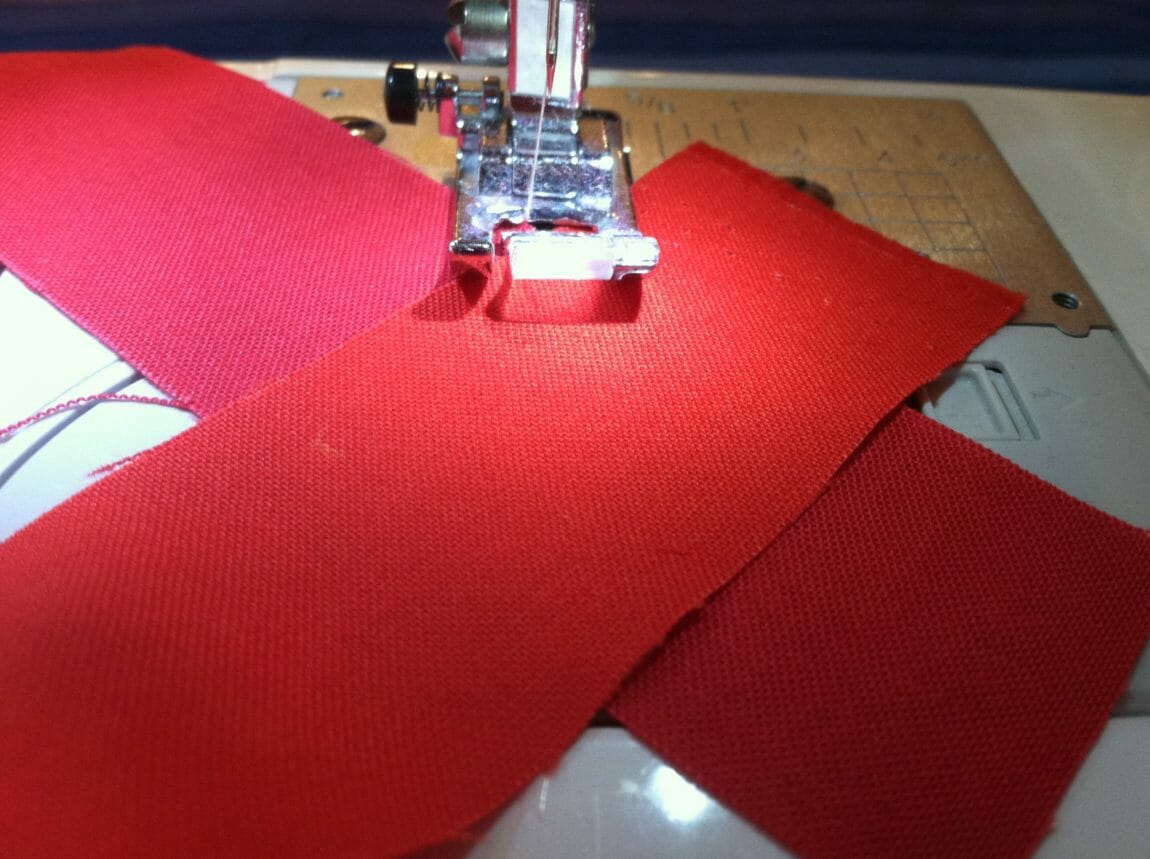
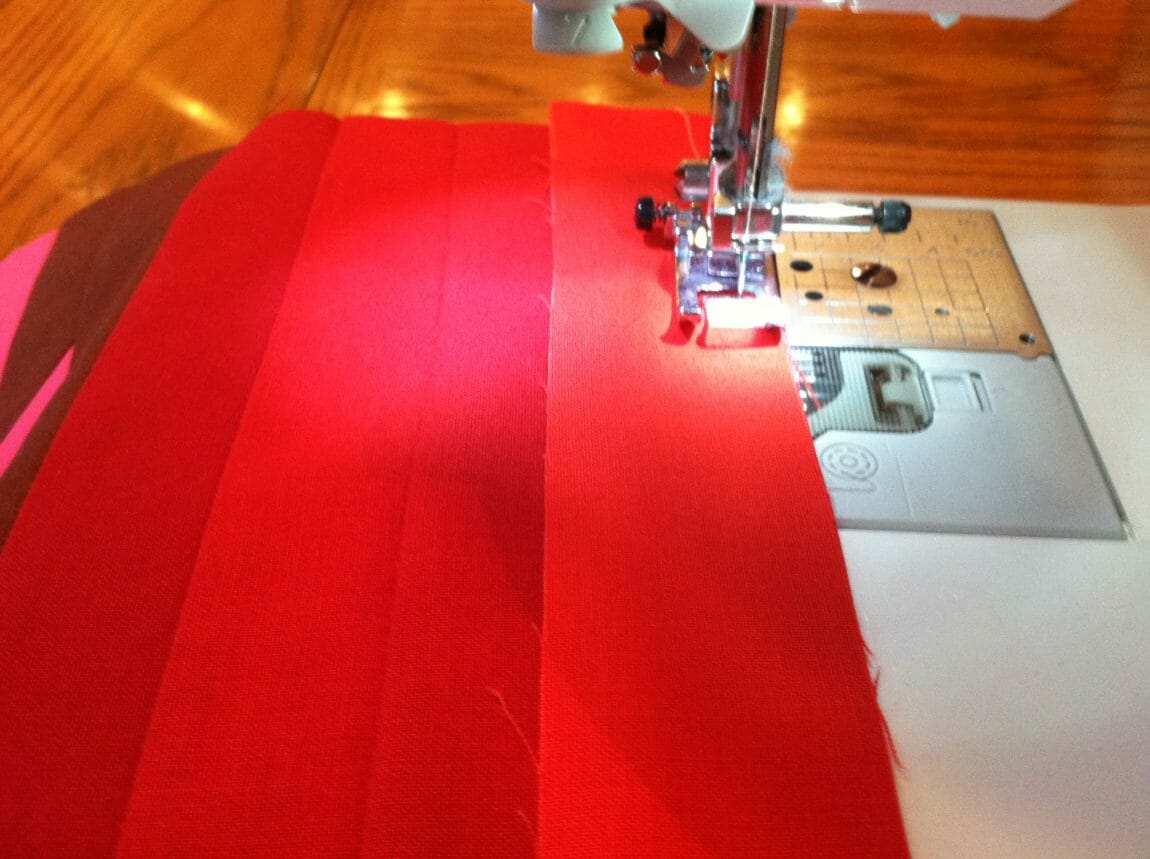
Step 3 – Sew a straight line from corner to corner where the fabrics meet, just like if you were creating binding for a quilt.
Step 4 – Trim the edges to a 1/4″ seam allowance. You can eyeball this, it doesn’t have to be exact.
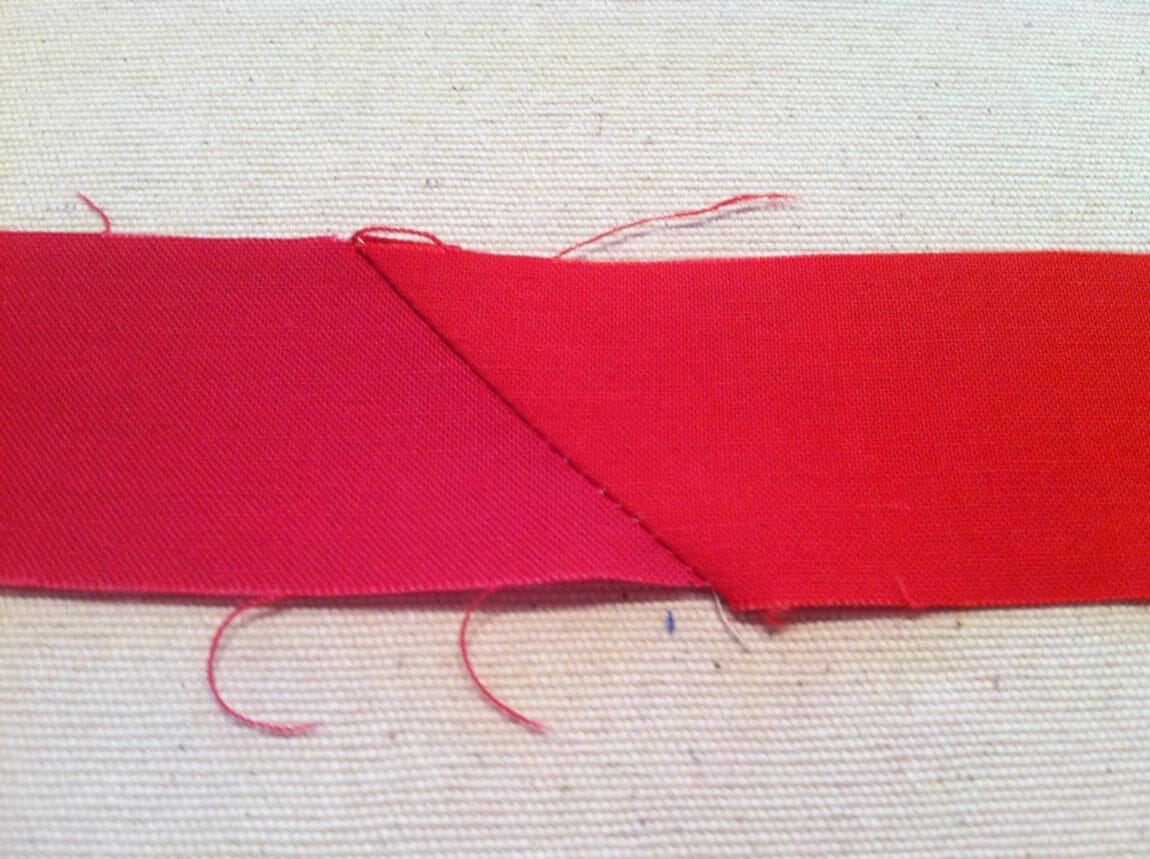
Step 5 – Press the fabric open so you now have a straight piece of fabric.
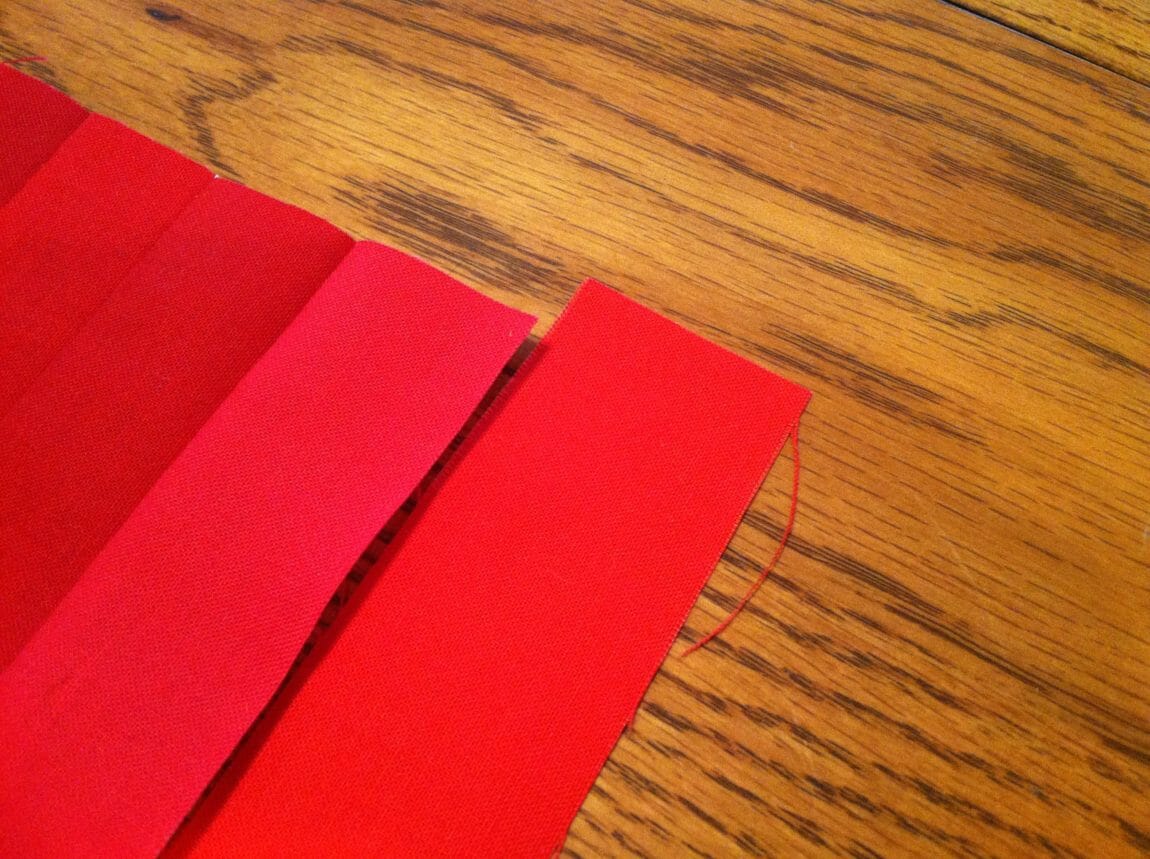
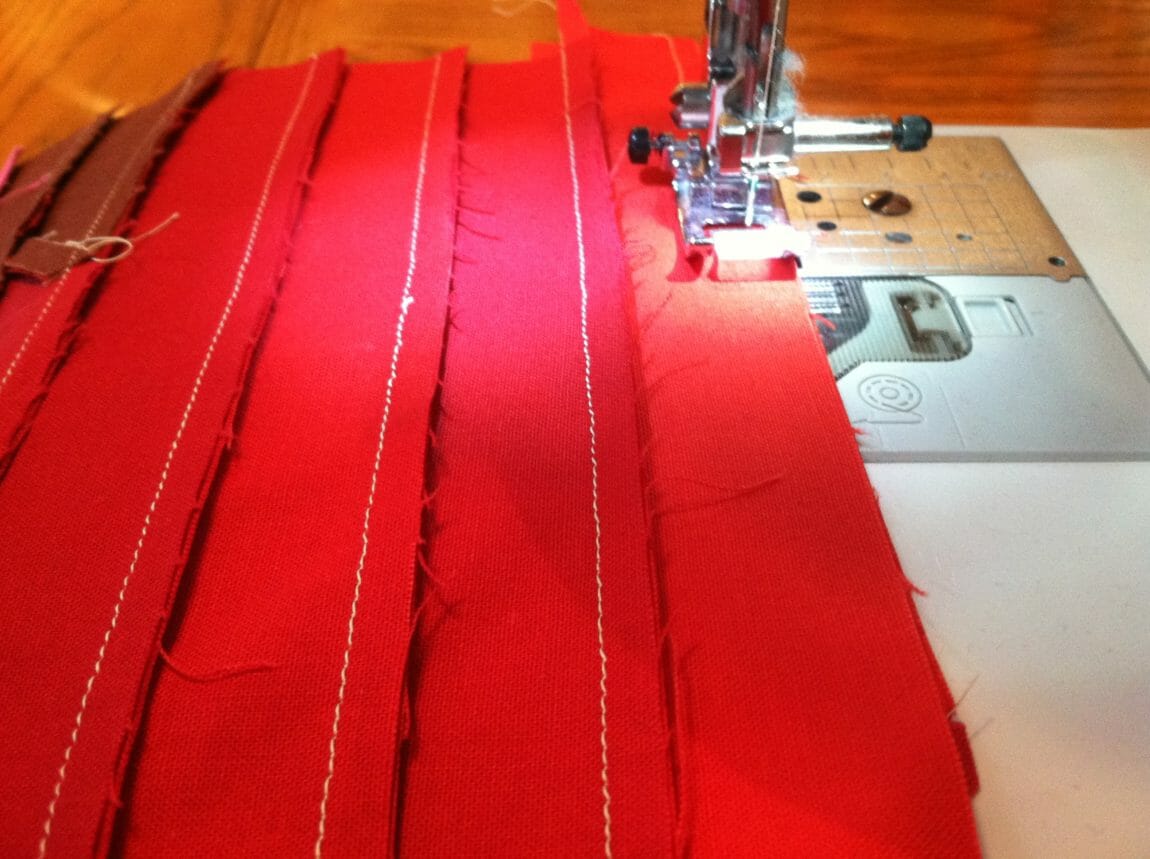
Step 6 – Cut your first row to 36 inches, and save the extra for the beginning of the next row.
Step 7 – Repeat steps 2 through 5 with the next fabric in your jelly roll.
Step 8 – Cut the next row about 1 inch larger than the previous row and sew it right sides together to the previous row. Be careful to arrange the fabric so the transitional fabrics are one opposite side of the quilt. For example, if you ended with yellow fabric on the right side of one row, and then transitioned to green in the next row. They leftovers from the yellow strip should be at the beginning of the next row on the left side.
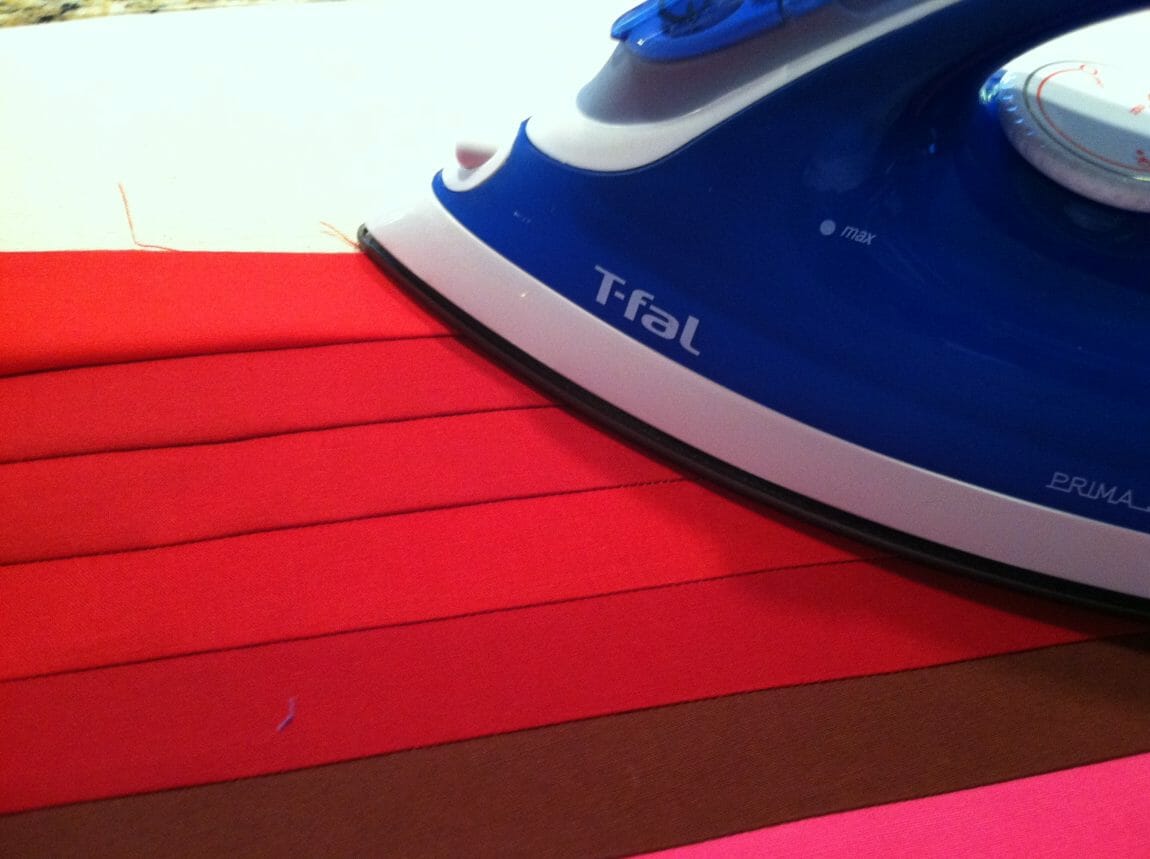
Step 9 – Press the fabric open, starting in the center. This helps keep your strips from warping and loosing their square edge.
Step 10 – Keep making more rows until you run out of fabric in your jelly roll. But pause to square up the edges every six or seven rows.
Tip – One other way to keep your strips square is to alternate the sides you sew on. To do this, sew one row with the right side of the quilt facing up, and the next row with the wrong side of the quilt facing up.
Using an entire 2.5″ jelly roll, will this make a couch size snuggle quilt?
I thought this would be simple to follow along… I was clear through Step 7 (or at least I thought I was). You lost me at 8.
Row 1 is just 2 strips, sewn on a bias to form a single 36″ strip, Yes?
Then for Row 2, I’m taking the left over tail of Row 1,grabbing the 3rd strip from the jelly roll, doing the bias seam, cutting the resulting strip to 37″, and sewing this to the right and side of Row 1, yes?
Row 3, tail from Row 2, bias sewn to strip 4, cut to 38″ and sew to left side of Row 1?? Then alternate between right and left side??
Sorry if I’m being a bit dense.
Yes, to everything except cutting row 3 to 38-inches. You can cut all the subsequent rows to 37-inches and then square it up at the end. Let me know if you have any other questions. My email is stephanie@quiltaddictsanonymous.com.
Thank you! Now to just find someone who has the classic Kina Cotton Jellyroll in stock.