How to make a barn quilt (and have a lot of fun)
During one of my sit-n-sews’ recent gatherings, my good friend Kay said how much she wanted a barn quilt and did anyone know how to make them?
Well, I once interviewed a guy who made more than 200, so yeah, I could figure it out. From there we planned a day of fun. Kay hosted (her husband has a HUGE work space we took over for the day), we all brought a dish to pass and we each brought supplies for making barn quilts.
You can watch the video above to see how to make your own, and how much fun we had, but I’m writing out the instructions below along with the supply list so you can print this out and have your own day of fun with your sit-n-sew.
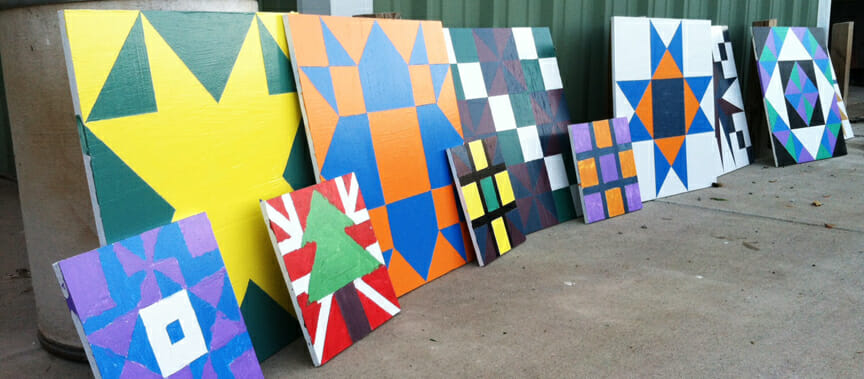
Another bonus to making barn quilts with your sit-n-sew is you can split the costs. It cost about $200 to get everything, but when we split it evenly among four of our, it worked out to $50 a person, or $25 per 2-foot-square barn quilt. Not bad when they retail for around $100 each.
Supplies
- One 4′ x 8′ sheet of 1/2-inch plywood, cut into 2-foot square or 1-foot square sections
- 1 quart primer/sealer for outdoor use
- 1 quart white high gloss paint for outdoor use
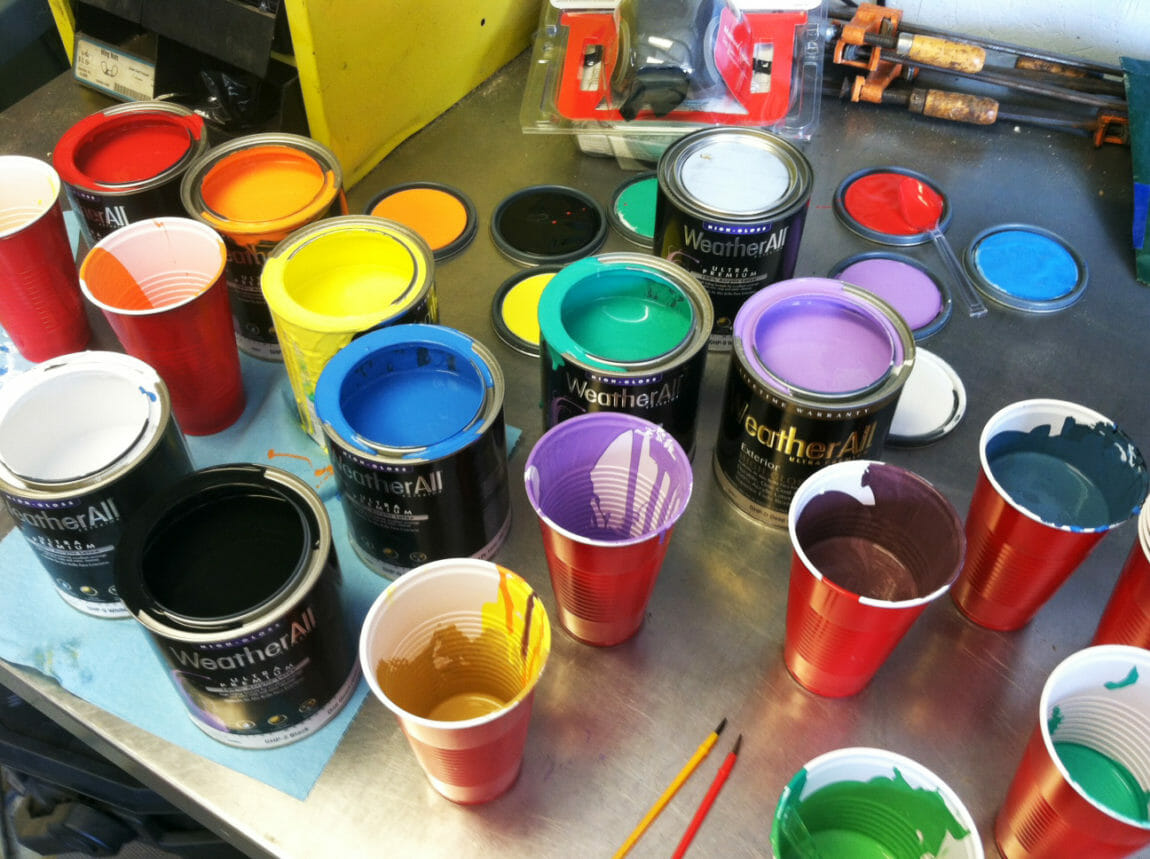
- Quarts of high gloss paint for outdoor use in your favorite colors (I picked up a medium shade of every color of the rainbow plus black)
- Pencils
- Quilting ruler or carpenters square
- Painters tape (I recommend Frog Tape)
- Artist brushes
- Paint brushes
- 2 paint rollers
- Paint roller handle
- 2 paint trays
- Plastic cups and spoons for mixing paint
- Saw horses or an old folding table to use as a work surface
Instructions
- Cut the plywood into a two-foot or 1-foot-square sections. You can get eight, 2-foot square sections, or 32, 1-foot squares, or any combination of the two. (I recruited my husband to do this step for us.)
- Use the paint roller, paint roller handle, paint tray to apply one coat of primer sealer to the front back and sides of the wood squares. You’ll need to let one side dry completely before flipping it over to do the opposite side.
- Find the smooth side of the plywood (one will be pretty rough, you don’t want that side). Use the paint roller and paint tray to roll the high gloss white paint on the smooth side of the plywood. I did all this before we got together for our day of painting.
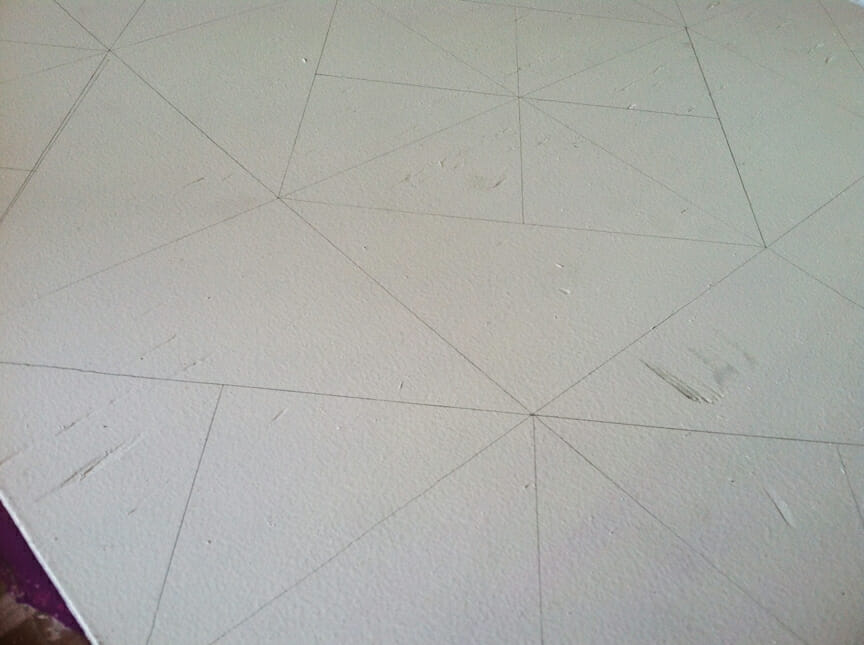
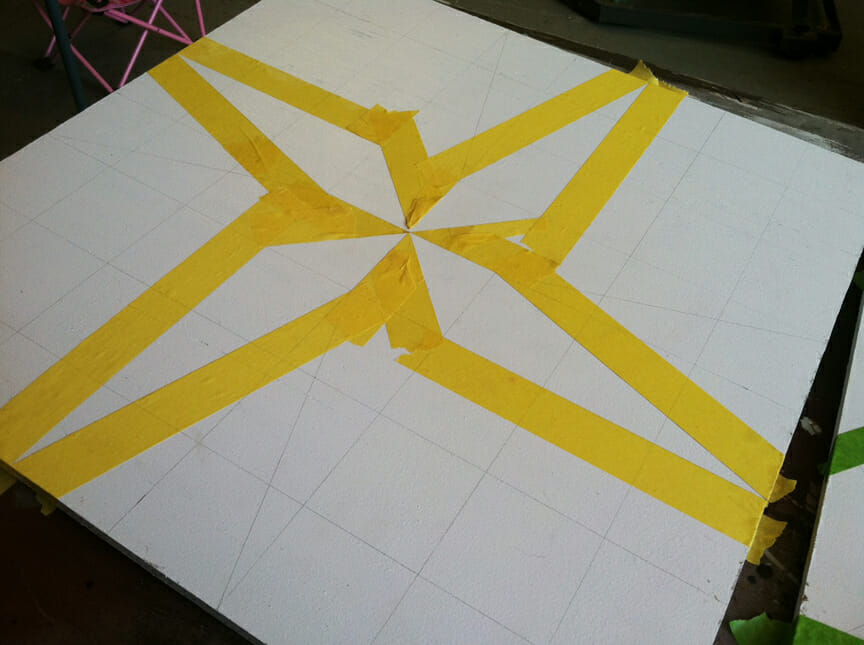
- Determine the grid your quilt block is laid out on. For example if you have a nine-patch, then you have a 3×3 grid. Transfer the grid onto your your wooden board using the pencils.

- Once your grid is in place, draw the quilt design onto your board using the pencils.
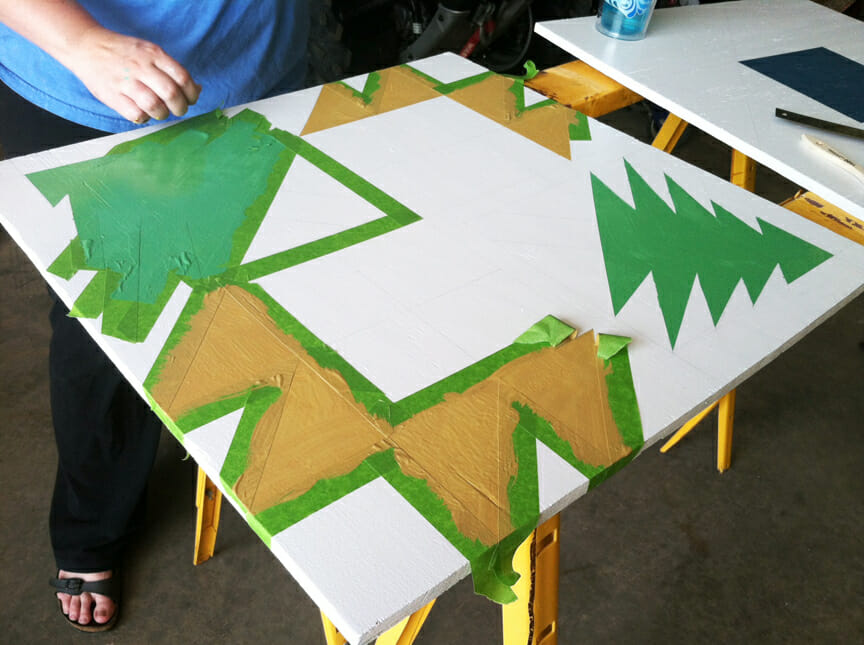
- Tape off the first color you want to paint, being careful to press the edges down securely.
- Select the color you want, or mix one together using the paint colors available and paint the first section.
- Remove the tape while the paint is still wet. If your paint bled under the tape, don’t worry, you can touch it up with the artist brushes at the end.
- Let the paint dry the recommended time specified on the manufacturer’s instructions and go enjoy some food, sewing or a movie with your sit-n-sew buddies.
- Repeat steps six through nine until all the colors are painted. (Note, you don’t have to paint the white sections, because that was already done when you applied a coat of white high gloss paint in step three.)
- Take the artist brush and carefully fix any paint bleeds. Check out the video for tips on how to do this perfectly!
- Hang your barn quilt!


Love your barn quilts! Would really like to do this–thanks for the tutorial!
You did a great job on the tutorial! What a fun day!
Love your instructions. How did you hang the barn quilts? Such as, what method did you hang them? With bolts, screws, wire, were backer boards installed first and then the barn quilt on that, etc?
Thank you.
The hanging instructions vary depending on the surface you are hanging it on. Here’s a link with some tips: http://www.hqbt.org/barn-quilt-instructions.html
Thank you very much for the hanging instructions. Your article is great also. Thanks for the inspiration.
I would bet that depending on size of your desired “barn” quilt, you could do one on your garage door which I may consider doing …if the weather ever gets a bit cooler here in TX. My garage door just happens to be made of wood & is a one car garage door.
Thank you for the instructions, I love the quilts you all made! I got this advice from a professional design painter. Once your tape is down go back over the edges of the tape (where you color changes) with another brushing of the white paint and let dry. This keeps the color paint from bleeding under the tape since it just bled with the white paint and sealed it. Then use your color paint and remove the tape. Perfect edges! Thanks again!
Love your barn quilts! This past summer our guild held a class to make ours and we used portable hair dryers to speed up the paint drying process. It worked great since we only had a 4 hour class!