How to silk-dye Easter eggs
Note: This post was originally written in March 2016 and was updated in March 2018 to include a video tutorial. In the intervening years my daughter grew old enough to help with the task, so I had her on as a special guest to help me show you all how to silk dye Easter eggs.
We both had a blast, as you’ll see in the video, and proved this is super simple, less messy than the dye packs you get at the store and create much cooler results. Watch the video above and use the step-by-step instructions below with photos to create your own fabulous collection of Easter eggs.
This is a great holiday craft to do by yourself, with kids, and best of all, I was able to do it all for less than $20. Not bad for an afternoon of fun.
If you make silk dyed Easter eggs this spring, be sure to use the hashtag #quiltaddictsanonymous on Instagram so I can see how they turned out!
OK, I know this silk-dying Easter eggs is kind of a stretch for a quilting blog. But it involves fabric, and if you are addicted to quilting, chances are you also are addicted to fabric. And my quilter neighbor came right over to see how they turned out when I told her what I was up to, so we’re doing this.
Here’s what you’ll need:
- A dozen eggs
- Six silk ties (make sure to read the label, polyester will not work)
- A dozen muslin squares cut to 7-inches
- A dozen twist ties
- 1/4 cup of white vinegar (apple cider vinegar works in a pinch)
- Pot with lid
- Water
- Old towel
- Tongs
- Scissors
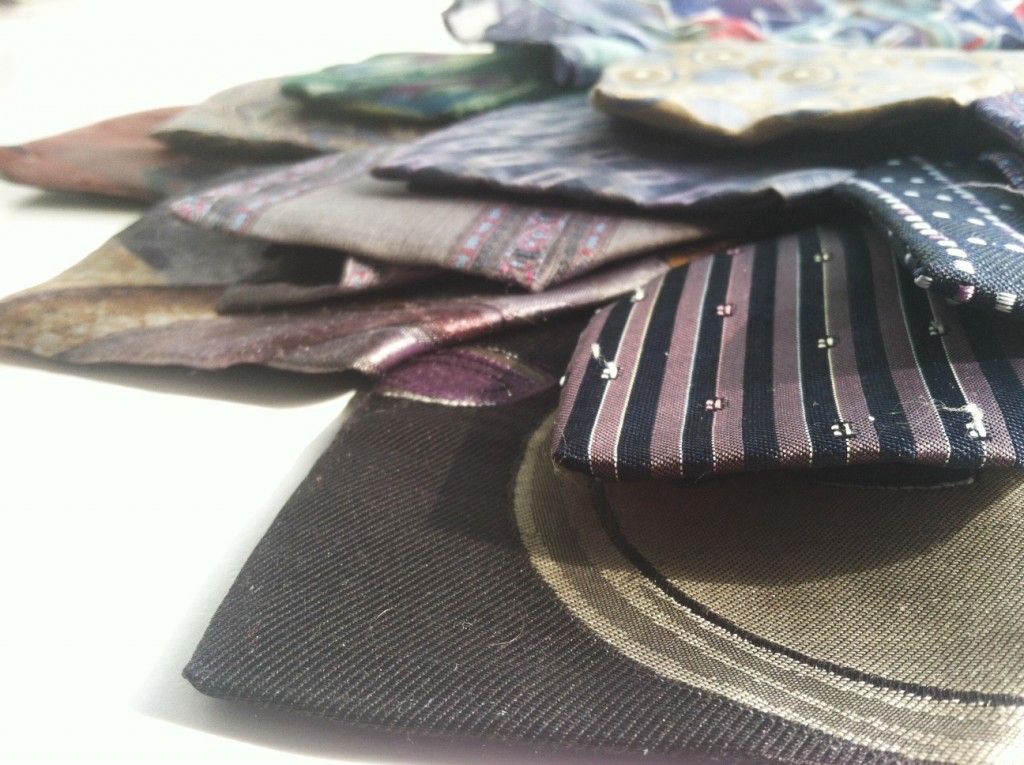
Step one is raiding your local Goodwill for silk ties. I cannot stress enough that they must be 100 percent silk. This does not work with polyester. You will just waste $2 and have a sad white egg. I found that the uglier the tie, the better the egg. Look for the truly crazy prints that look like they’ve been hiding in the back of the closet since the 1980s. Those make awesome eggs.

Now you want to cut your tie apart. They are usually loosely stitched along the seam in the back. I didn’t even have to get out the seam ripper, I just pulled out my embroidery scissors and went to town. I had a dozen ripped open in less than half an hour.
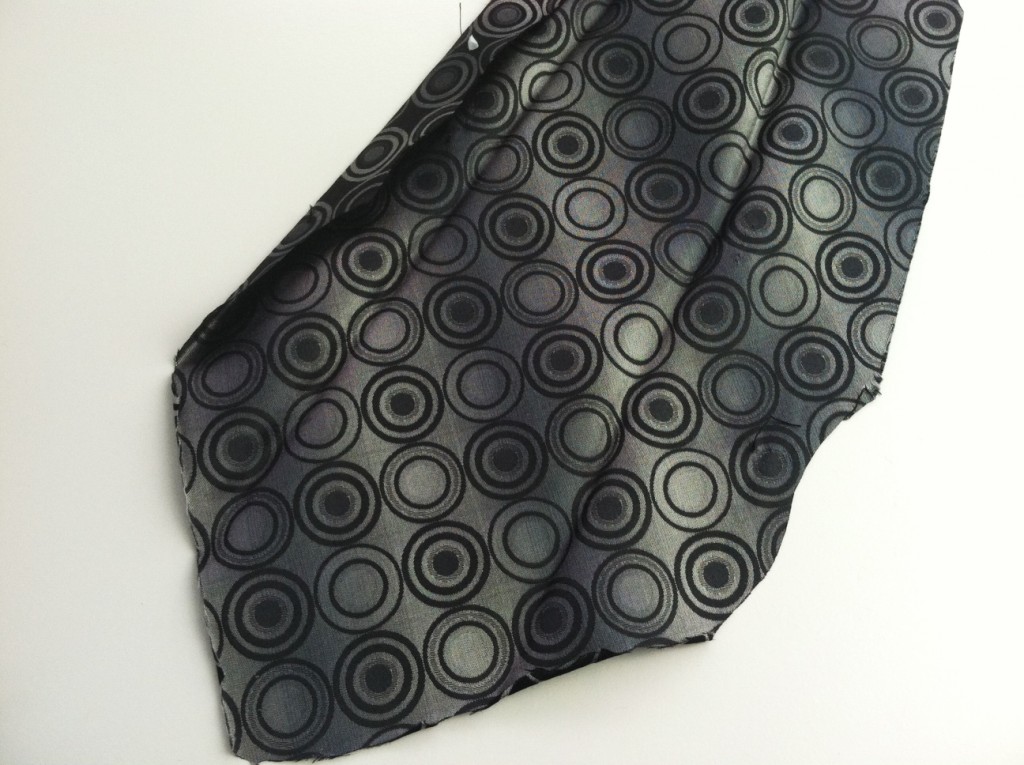
You’ll want to cut away all the innards of the tie. Remove the stabilizer, any lining at the tip until you are left with the silk print you see when the tie is worn.
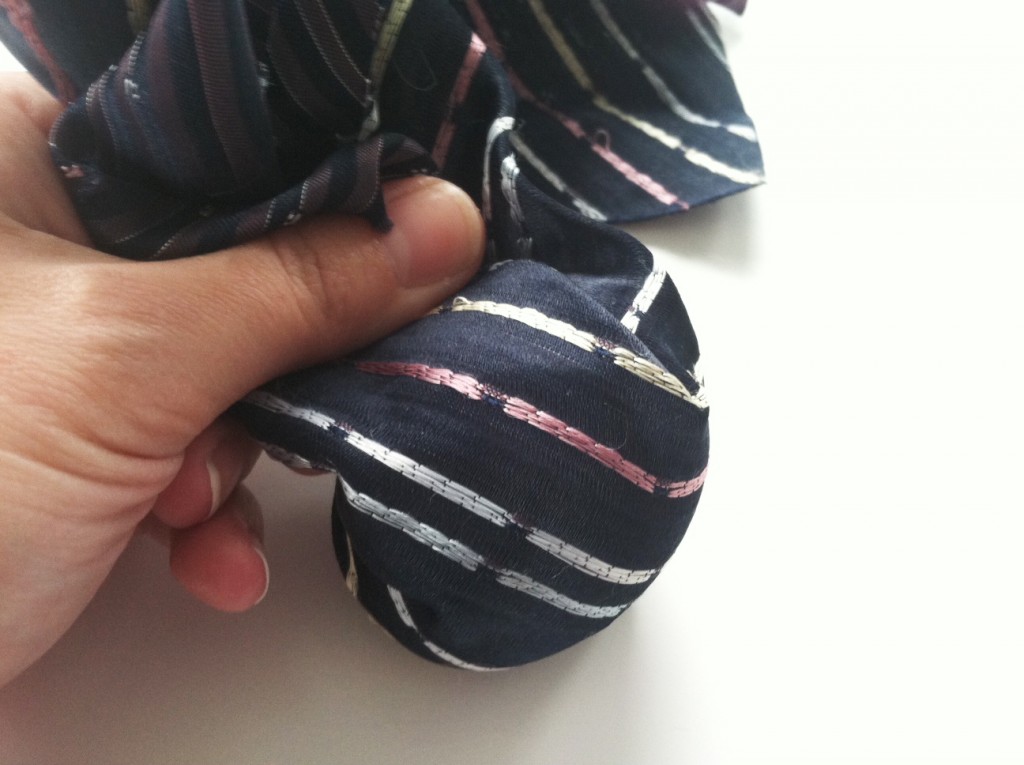
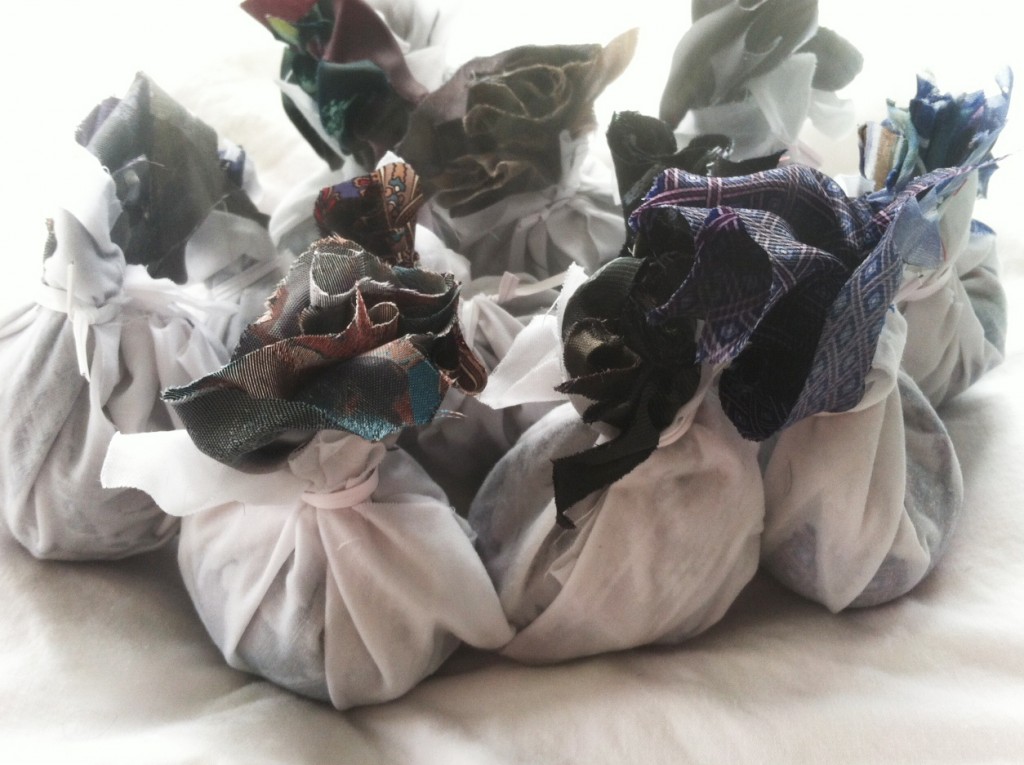
Next you want to cut the tie into 6- to 7-inch sections. These don’t have to be perfectly square, but the do need to be large enough to wrap around the egg and leave a tail as shown above. You should be able to get two to three of the sections out of each tie.
One tip at this section, the dye from the fabric will only transfer to the egg where the fabric comes in direct contact with the shell. I found I got the best results when I got one side really smooth and then pinched the corners together on the opposite side as shown above. That way when you’re done, you can put the side that had the smooth transfer up, and the side that had the tail on the bottom where no one can see.
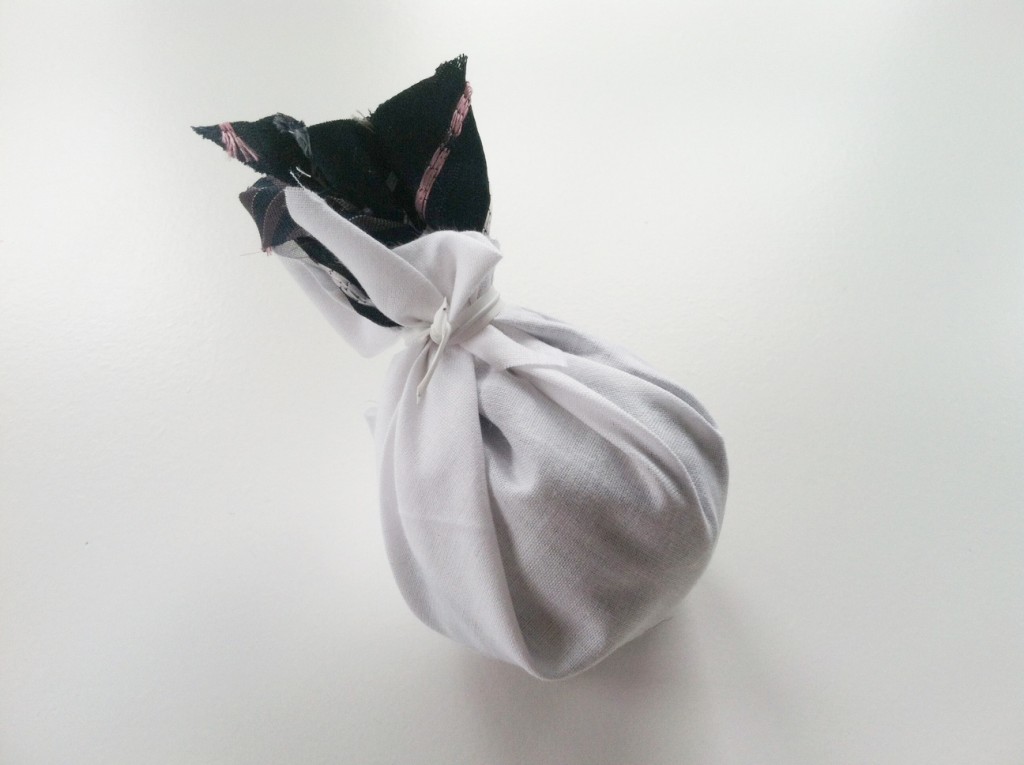
Next wrap the 7-inch muslin square around the silk and secure it with a twist tie. Side note – If you’re having trouble finding twist ties, check out the children’s goodie bag section of your local party store. For about $2 you can get a selection of party bags with twist ties. If you’re really fancy, you can reuse those bags to give your eggs away as gifts on Easter.
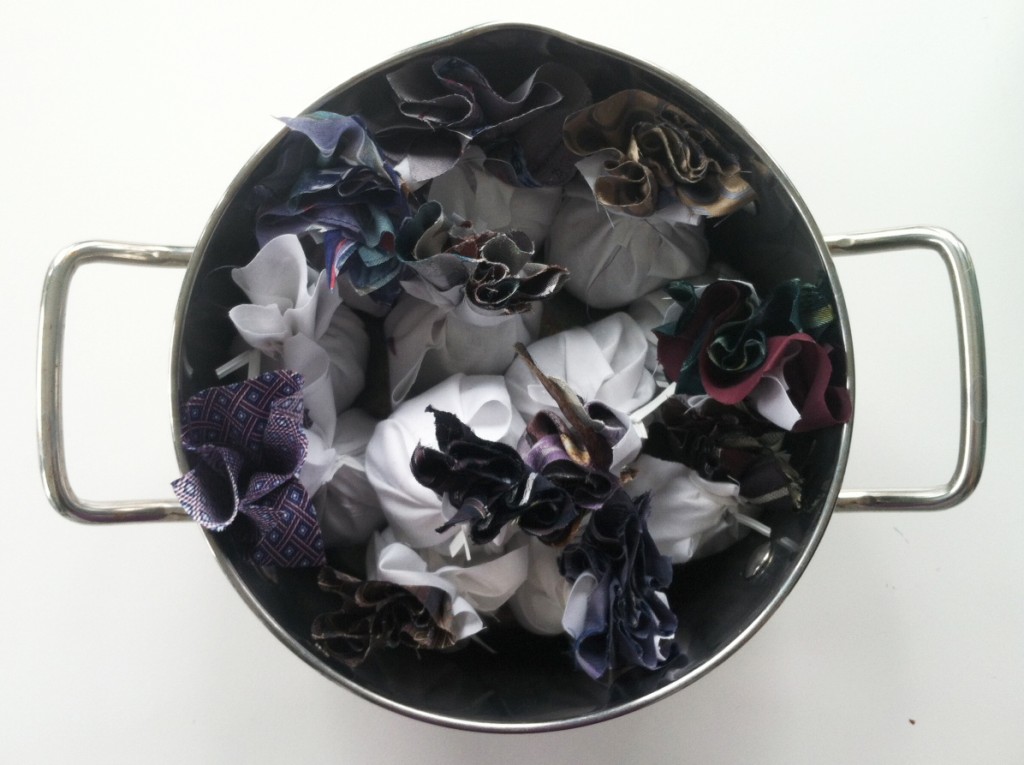
Now arrange all your eggs in a pot. I used a medium-sized pot and was able to get all 12 eggs in. You just want to make sure you can fit your eggs in and cover them in at least two inches of water.
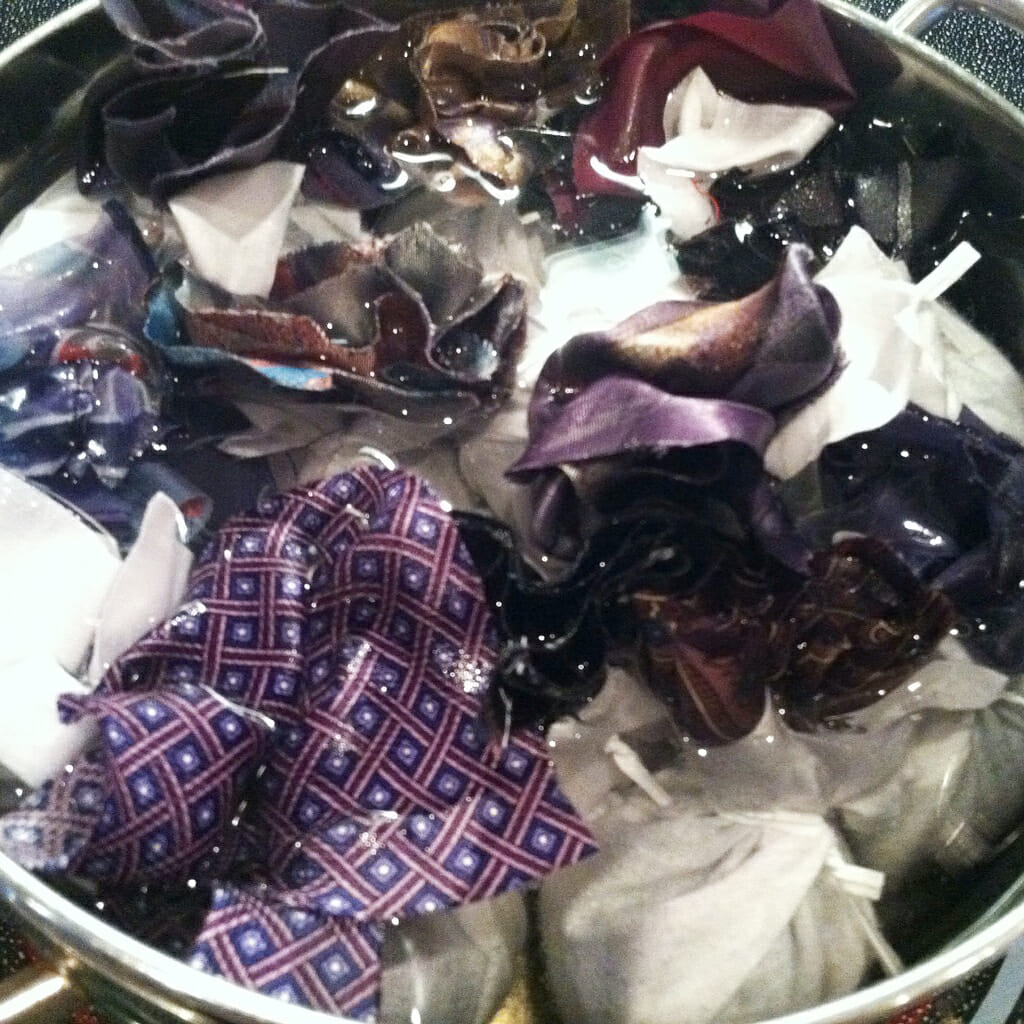
Fill the pot with water so that the eggs are covered with at least two inches of water. Add 1/4 cup of white vinegar and bring the pot to a boil. Lower heat and simmer for 20 minutes.
Use tongs to remove the eggs from the boiling water and place them on a towel to cool. The towel may get dye on it, so make sure it is one you’re OK parting with when you’re done.
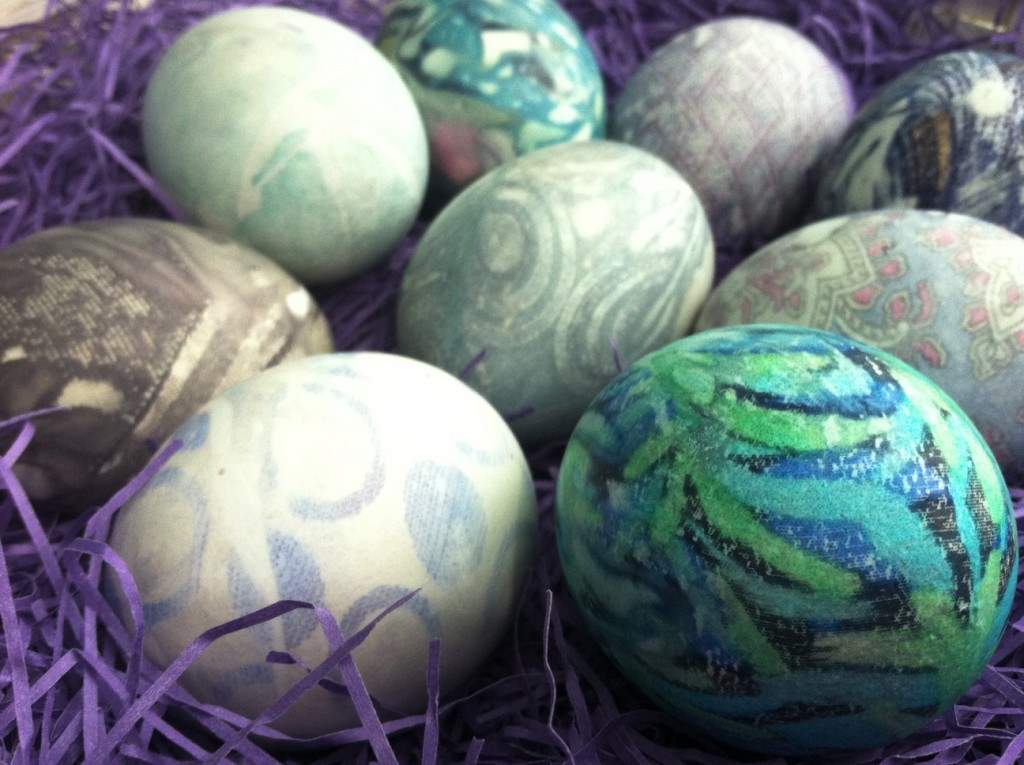
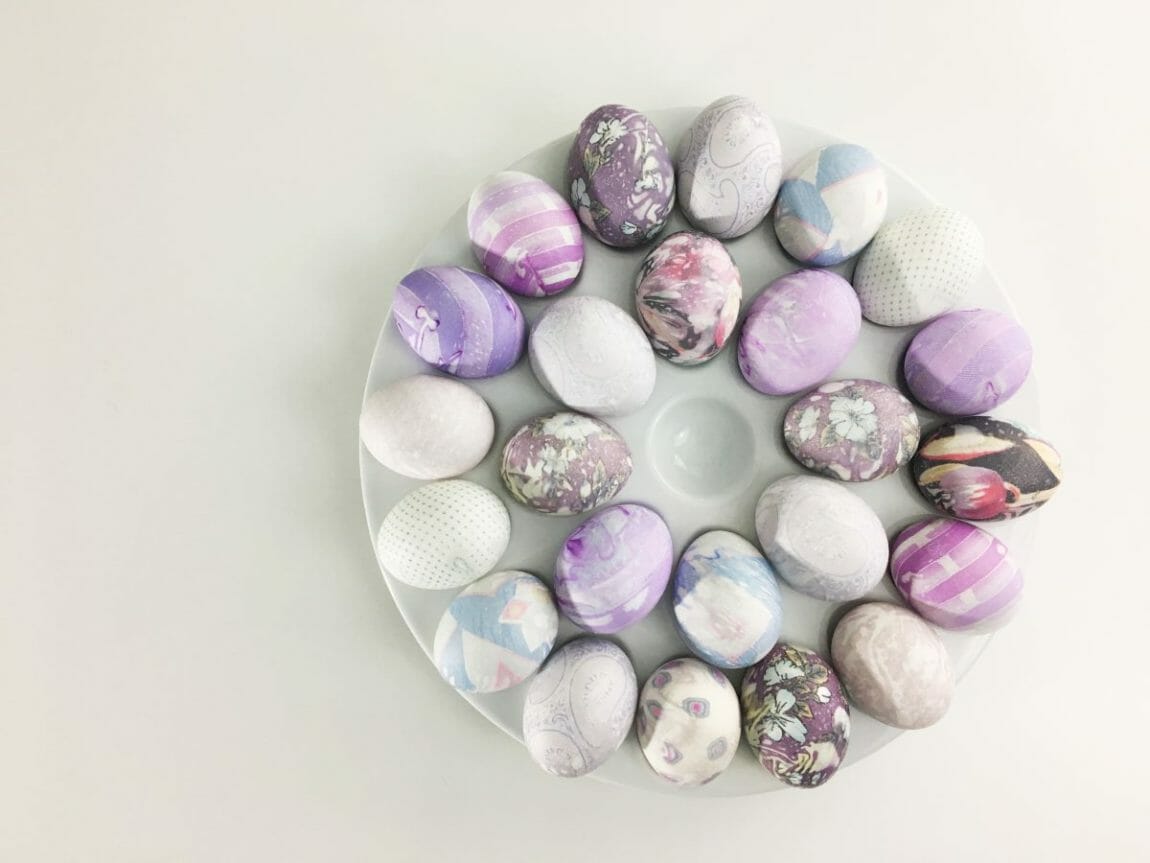
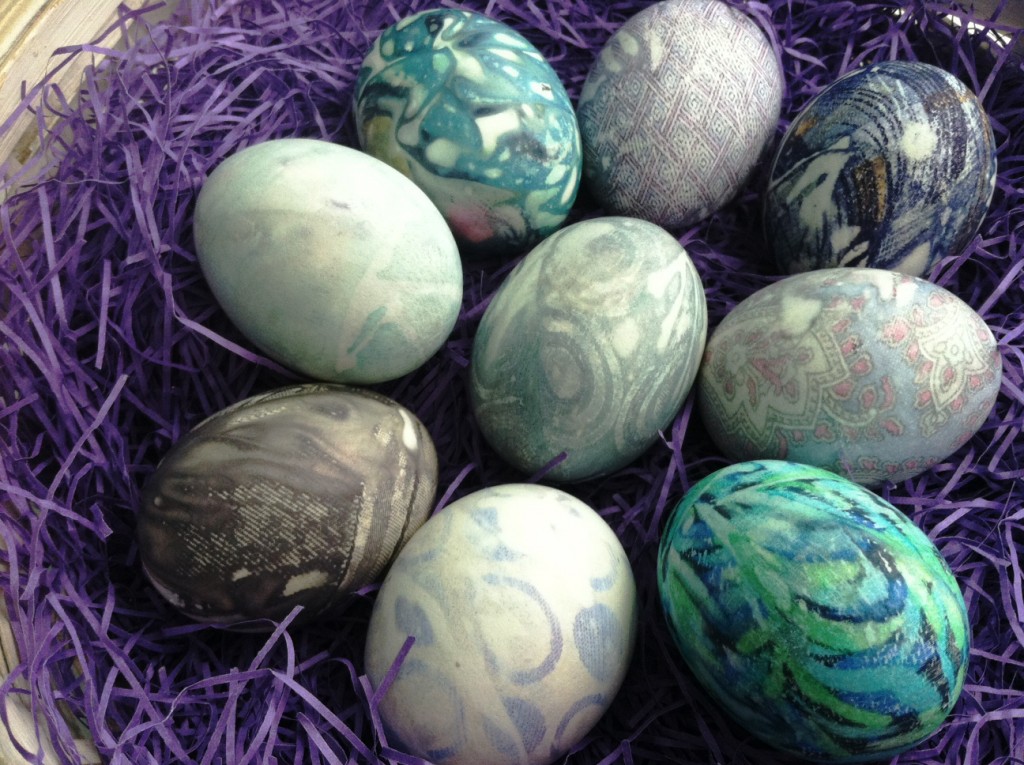
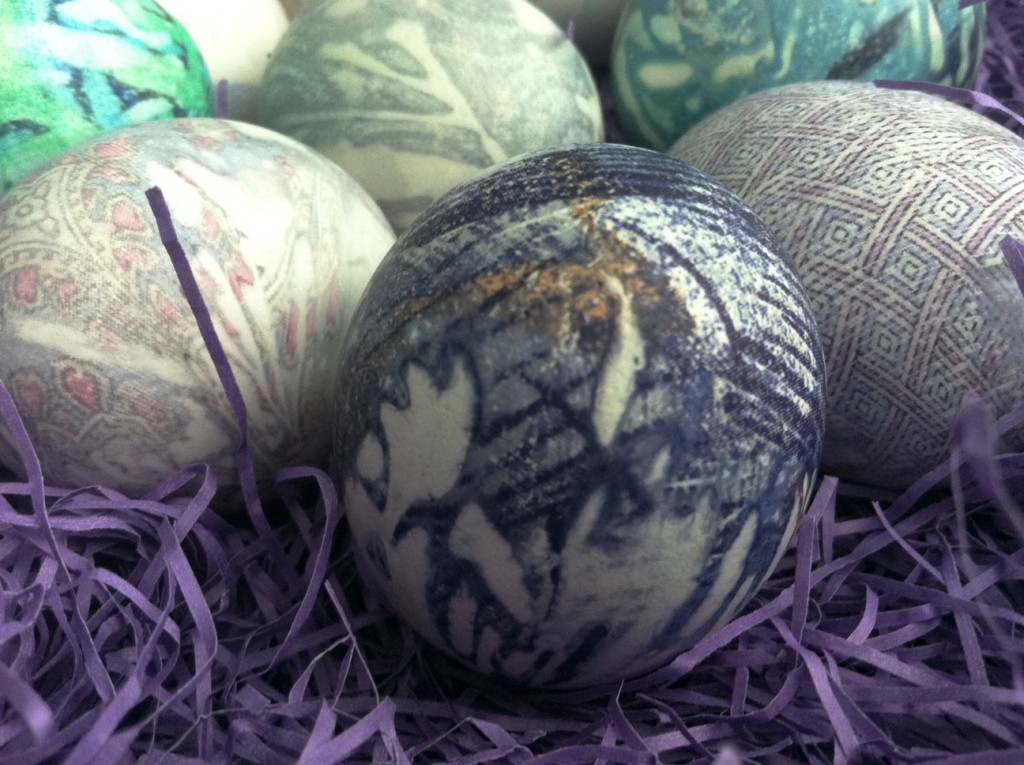
When the eggs have cooled, remove the twist tie, muslin and silk to reveal your beautiful silk-dyed creations. You an reuse the silk up to three times and still get the same results. The colors will be muted tones of the original tie, so go bold and vibrant when you’re choosing your ties.
I just loved this project. It was so much more fun than dying Easter eggs with food coloring, and a lot less mess. I can’t wait until my daughter is old enough next year to go with me to pick out which ties we will use to create our silk-dyed Easter eggs. At 22 months she already swipes her hand across the bolts of fabrics whenever we go to the store, so I know I already have a little fabric addict in the making.
If you use this tutorial to make silk-dyed Easter eggs, I’d love to see photos of them. Post them to my Facebook page at www.facebook.com/quiltaddictsanonymous.


I just love this idea. Was wondering if this would work on like the wood eggs or other medium so you could keep for years to come?
I did this with eggs years ago. If you are careful with them they will dry up within a year, so put them back in the egg carton and store in safe place. If they get broken before dried my not be a good idea.
Someone needs her own YouTube channel!
Not a stretch at all! This is great. I wouldn’t have believed how easy it could be. It would be fun for all kinds of occasions, I think! Thanks for the tutorial and the video. You managed so well with an active little girl. I loved watching her explanation of how to do the eggs. =)
This is the first time I have seen dying eggs this way. Am definitely going to try it. Your daughter is adorable, but I did find her being in the whole video somewhat distracting.